Blog

  • Learn What Is Bootstrap in Web Development in Minutes 

    Learn What Is Bootstrap in Web Development in Minutes 

    Building a website can feel like arranging hundreds of tiny pieces. Learning what is bootstrap in web development makes that process easier because Bootstrap provides a ready-made foundation for creating clean, responsive websites without styling every element from zero.

    Bootstrap is a free, open-source front-end framework built with HTML, CSS, and JavaScript. It helps developers create mobile-first websites faster through reusable layouts, utility classes, interface components, and interactive plugins.

    Key Takeaways

    • Bootstrap is a front-end framework.
    • It supports responsive design. 
    • It includes a 12-column grid. 
    • It provides reusable UI components. 
    • It reduces repetitive coding while allowing custom styles.

    Core Bootstrap Components

    Bootstrap combines several tools that create structured, responsive, and consistent web pages.

    The Grid System

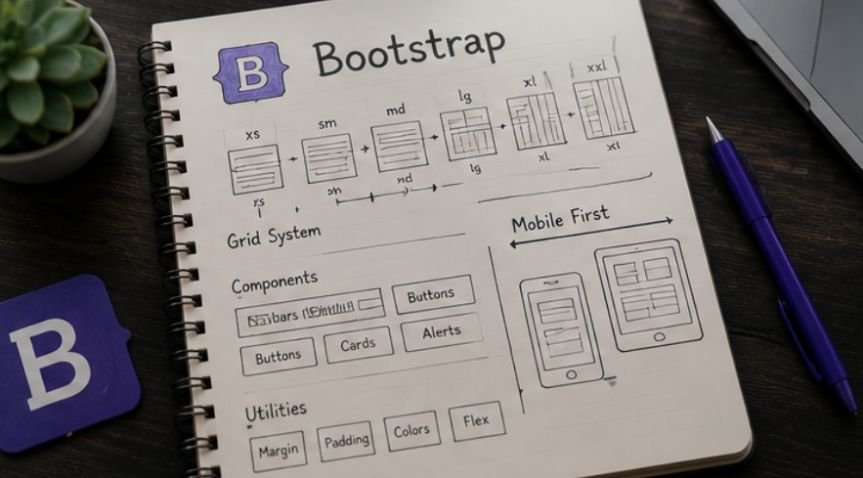
    The Bootstrap grid uses 12 flexible columns. Developers place content inside containers, rows, and columns, then control how much space each section occupies.

    Responsive breakpoint classes tell the browser when the layout should change, making mobile-first development easier.

    Pre-Styled UI Components

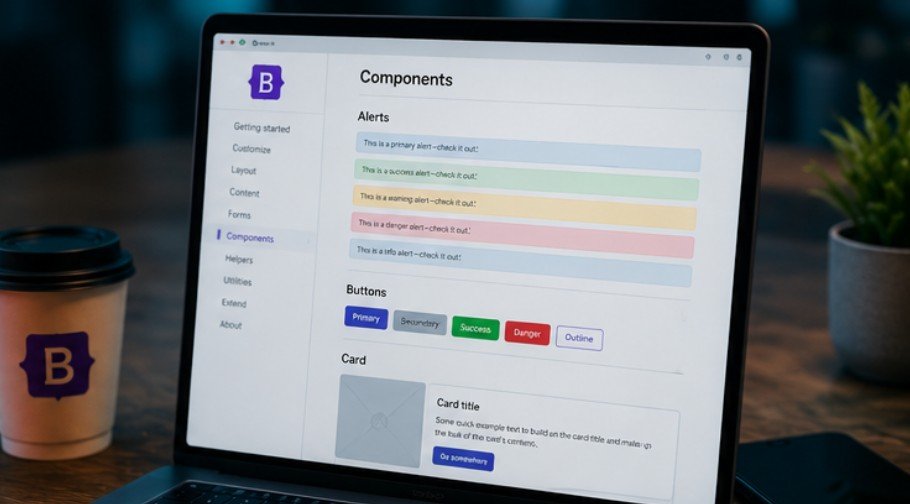
    Bootstrap includes buttons, forms, cards, alerts, navigation bars, dropdowns, tables, and pagination controls. These components already contain spacing, colors, borders, and responsive behavior.

    Developers can keep the defaults or customize them with CSS, Sass variables, and utility classes. This creates a consistent starting point without forcing every site to look identical.

    JavaScript Plugins

    Optional JavaScript plugins add modals, carousels, collapsible menus, dropdowns, tooltips, off-canvas panels, and accordions. Bootstrap 5 uses standard JavaScript and does not require jQuery.

    How Bootstrap Works
    How Bootstrap Works

    Understanding what is bootstrap in web development becomes practical once you see how the framework connects to an ordinary HTML page.

    Connect the Framework

    Start with a standard HTML5 document and include the viewport meta tag so responsive layouts scale correctly on phones and tablets.

    Next, connect Bootstrap through a content delivery network, download its files, or install it with npm. The CSS controls styling, while JavaScript powers interactive components.

    Add Bootstrap Classes

    Bootstrap works by adding predefined classes to HTML elements. A normal button becomes a polished primary button by adding the classes btn and btn-primary.

    Layout classes work similarly. A developer can create a container, add a row, and insert responsive columns without writing complex width calculations.

    Test and Customize

    Test the page at several screen sizes. Check whether columns stack correctly, menus open smoothly, text remains readable, and forms work with a keyboard.

    Then customize colors, typography, spacing, borders, and component states. A strong Bootstrap website should reflect its brand instead of resembling an unchanged template.

    Key Benefits of Bootstrap
    Key Benefits of Bootstrap

    Bootstrap remains popular because it solves common front-end problems with reusable tools.

    Faster Development

    Prebuilt components reduce the time needed to create interface elements. Developers can assemble landing pages, dashboards, forms, and navigation systems without rebuilding each feature.

    Better Device Consistency

    Bootstrap uses responsive breakpoints to help content adapt across phones, tablets, laptops, and desktop monitors. Its tested styles also reduce browser inconsistencies.

    Easy Learning and Customization

    Beginners with basic HTML and CSS knowledge can understand Bootstrap classes quickly. Advanced developers can change Sass variables, use CSS custom properties, import selected modules, or override component styles.

    Real-World Bootstrap Uses

    Bootstrap appears in practical projects because it balances speed, structure, and flexibility.

    Business Sites and Landing Pages

    A business site may need a responsive header, service cards, pricing sections, contact forms, and a footer. Bootstrap provides foundations for each element.

    Navigation can be improved further by learning how to make sticky header CSS, which keeps important menu links visible as visitors scroll through longer landing pages.

    This approach works well alongside Bootstrap navigation components when developers want persistent access to key sections without relying on additional plugins.

    Dashboards and Admin Panels

    Dashboards often contain tables, filters, alerts, forms, cards, and side navigation. Bootstrap keeps these elements visually consistent and easy to arrange.

    Teams can focus on data, permissions, and application logic instead of repeatedly styling basic components.

    Prototypes and Learning Projects

    Bootstrap helps teams test ideas before investing in a custom design system. They can build a working prototype, collect feedback, and improve it before production.

    Students can use it to understand responsive grids, spacing, components, and mobile-first design after learning HTML and CSS basics.

    Limits to Consider

    Bootstrap is useful, but using it without planning can create problems.

    Extra Code

    Loading the complete framework may include styles and scripts a small site never uses. Unnecessary code can increase page weight.

    Use minified production files, avoid unused JavaScript, and import selected Sass modules when performance matters.

    Familiar-Looking Designs

    Sites may look generic when developers use default components without customization. The same buttons and cards can appear across unrelated projects.

    Changing typography, colors, spacing, borders, and component details creates a stronger identity.

    Class-Heavy Markup

    Bootstrap may require several classes on one HTML element. Large class combinations can make markup harder to scan.

    Bootstrap Versus Other Tools

    Bootstrap Versus Other Tools

    Comparing Bootstrap with other technologies clarifies its role.

    Bootstrap Versus CSS

    CSS is the language browsers use to style HTML. Bootstrap is a toolkit built mainly with CSS and JavaScript that provides ready-made rules and components. A website can use plain CSS without Bootstrap.

    Bootstrap Versus Tailwind CSS

    Bootstrap provides finished components with an established style. Tailwind CSS focuses on utility classes developers combine for custom interfaces.

    Bootstrap suits teams wanting ready-made components. Tailwind may suit projects requiring a highly specific design system.

    Accessibility and Performance

    Responsive design is not automatically accessible or fast. Developers remain responsible for the finished experience.

    Support Every Visitor

    Use semantic HTML, clear form labels, visible focus indicators, descriptive buttons, and logical heading order. Test interactive components with a keyboard and screen reader.

    Developers should also understand how to test website accessibility across different devices and assistive technologies. Regular testing can uncover problems with keyboard navigation, color contrast, form labels, focus states, and interactive Bootstrap components before they affect real users.

    Bootstrap offers helpful patterns, but developers must apply accessibility guidance correctly.

    Keep Pages Lean

    Load only the styles and scripts the project needs. Compress images, use minified assets, and test Core Web Vitals after implementation. Performance decisions should be based on measurements rather than assumptions.

    Frequently Asked Questions

    1. What Is the Use of Bootstrap in Web Development?

    Bootstrap helps developers create responsive layouts, forms, navigation bars, buttons, cards, and interactive elements faster through reusable CSS classes and JavaScript components.

    2. What Is Bootstrap Versus CSS?

    CSS is a styling language, while Bootstrap is a framework built with CSS and JavaScript. Bootstrap supplies predefined layouts, utilities, and components that reduce repetitive styling.

    3. Is Bootstrap Backend or Frontend?

    Bootstrap is a front-end framework. It controls a website’s visible design and interaction, not databases, server logic, authentication systems, or backend processing.

    4. Is Bootstrap Used Anymore?

    Yes, Bootstrap is still used for dashboards, business websites, prototypes, internal tools, and responsive interfaces where fast development and consistent components matter.

    Bootstrap Still Packs a Punch

    Knowing what is bootstrap in web development helps explain how responsive websites can be built faster without sacrificing structure. Bootstrap offers a flexible grid, reusable components, utility classes, and interactive plugins. It works best when developers customize the design, remove unnecessary code, test accessibility, and choose it because it genuinely suits the project.


  • Dependency Injection in ASP.NET Core Explained

    Dependency Injection in ASP.NET Core Explained

    The first time I see a class creating five or six services with new, I know maintaining that code will become harder than necessary. Dependency injection in ASP.NET Core explained simply means letting the framework supply the objects a class needs instead of forcing that class to create them itself.

    ASP.NET Core includes a dependency injection container by default. I do not need a third-party library for normal DI scenarios. Once services are registered, the framework can create them, manage their lifetimes, and inject them where needed.

    That sounds simple. The part developers usually need to understand is how registration, resolution, and service lifetimes work together.

    What Dependency Injection Actually Does

    What Dependency Injection Actually Does

    Suppose a controller needs an email service.

    Without DI, the controller might contain this:

    var emailService = new EmailService();

    Now the controller knows exactly which implementation it uses. Replacing EmailService, mocking it during testing, or changing its dependencies becomes harder.

    With dependency injection, I depend on an abstraction instead:

    public HomeController(IMessageService messageService)

    {

        _messageService = messageService;

    }

    ASP.NET Core determines which implementation should satisfy IMessageService based on registrations configured when the application starts.

    Microsoft describes dependency injection as a technique for achieving Inversion of Control between classes and their dependencies. The official ASP.NET Core dependency injection documentation covers the built-in container in detail.

    The result is lower coupling. Classes focus on their own responsibilities rather than constructing the entire object graph beneath them.

    How the ASP.NET Core DI Container Works

    How the ASP.NET Core DI Container Works

    I find DI much easier to reason about when I separate it into three pieces.

    A dependency is something another class needs. An email service, repository, logger, or database context can all be dependencies.

    The container is the service provider that knows which services are available and how they should be created.

    Injection is the process of supplying one of those registered services to the class that requests it.

    Registration normally happens through builder.Services in Program.cs.

    For example:

    builder.Services.AddScoped<IMessageService, EmailService>();

    This tells the container that requests for IMessageService should receive an EmailService.

    The AddScoped part matters just as much as the interface and implementation. It controls the lifetime of that object.

    Understanding Transient, Scoped, and Singleton Lifetimes

    Understanding Transient, Scoped, and Singleton Lifetimes

    Service lifetimes are where Dependency injection in ASP.NET Core explained becomes more practical than theoretical.

    ASP.NET Core provides three common lifetime choices.

    Lifetime Instance behavior Typical use
    Transient Created each time requested Lightweight stateless services
    Scoped Created once per request scope DbContext, repositories, request-level services
    Singleton One instance for the application’s lifetime Shared thread-safe services, caches

    Here is the mental model I use.

    Imagine three users send three separate HTTP requests. During every request, the application needs the same service twice.

    A Transient registration can produce six objects because each resolution may create another instance.

    A Scoped registration normally produces three objects because each HTTP request receives one shared instance.

    A Singleton registration produces one object shared across all three requests.

    That simple request-by-request comparison makes lifetime selection much easier.

    Transient Services

    Register a transient service with:

    builder.Services.AddTransient<IMessageService, EmailService>();

    I use Transient when the service is lightweight, stateless, and safe to recreate frequently.

    The main cost is object creation. If a transient service has an expensive dependency graph, creating it repeatedly can become unnecessary overhead.

    Scoped Services

    Register a scoped service with:

    builder.Services.AddScoped<IMessageService, EmailService>();

    In a typical ASP.NET Core web application, a Scoped service lives for one request.

    Entity Framework Core DbContext is a classic example because related operations within one request can share the same context.

    Scoped services also help keep request-specific state isolated between users.

    Singleton Services

    A Singleton is registered with:

    builder.Services.AddSingleton<IMessageService, EmailService>();

    The same instance can then serve requests throughout the application lifetime.

    That makes Singleton useful for services designed to hold shared application-level state. However, the implementation must be safe when many requests use it concurrently.

    How to Implement Dependency Injection in ASP.NET Core

    How to Implement Dependency Injection in ASP.NET Core

    The cleanest implementation follows four small steps.

    Step 1: Define an Interface

    Start with the contract:

    public interface IMessageService

    {

        string SendMessage(string message);

    }

    The consuming class now depends on behavior rather than a concrete implementation.

    Step 2: Create the Implementation

    Next, implement that contract:

    public class EmailService : IMessageService

    {

        public string SendMessage(string message)

        {

            return $”Email sent: {message}”;

        }

    }

    I can later replace EmailService without rewriting every controller using IMessageService.

    Step 3: Register the Service

    Add the registration in Program.cs:

    var builder = WebApplication.CreateBuilder(args);

    builder.Services.AddScoped<IMessageService, EmailService>();

    var app = builder.Build();

    Registration connects the abstraction, implementation, and lifetime.

    Step 4: Inject the Dependency

    Now the controller requests the abstraction:

    public class HomeController : Controller

    {

        private readonly IMessageService _messageService;

        public HomeController(IMessageService messageService)

        {

            _messageService = messageService;

        }

        public IActionResult Index()

        {

            var result = _messageService.SendMessage(“Hello!”);

            return View((object)result);

        }

    }

    The controller never constructs EmailService. ASP.NET Core resolves it automatically.

    The same pattern becomes especially useful when learning how to build a REST API in ASP.NET Core, because controllers, repositories, database contexts, validation services, and business logic often depend on DI.

    Constructor Injection and Other DI Options

    Constructor injection is my default choice because dependencies remain explicit. Anyone reading the constructor can immediately see what the class requires.

    ASP.NET Core also supports dependency injection directly into Minimal API handlers:

    app.MapGet(“/send”, (IMessageService messageService) =>

    {

        return Results.Ok(messageService.SendMessage(“Hello”));

    });

    MVC controllers can use [FromServices] when a dependency is required by only one action rather than the entire controller.

    public IActionResult Send(

        [FromServices] IMessageService messageService)

    {

        return Ok(messageService.SendMessage(“Hello”));

    }

    I reserve action injection for narrow cases. If several actions require the same dependency, constructor injection usually produces cleaner code.

    Microsoft documents controller-specific options in its dependency injection into controllers documentation.

    Dependency Injection Mistakes I Avoid

    The most dangerous lifetime mistake is allowing a long-lived Singleton to capture a shorter-lived Scoped service.

    For example:

    Singleton Service

           ↓

    Scoped Repository

           ↓

    DbContext

    The Singleton may keep using an object that was designed to exist only within a request scope. This pattern is often called a captive dependency.

    Rather than thinking “Singleton is faster,” I choose lifetimes based on ownership and state.

    I also avoid injecting large numbers of unrelated services into one constructor. A controller needing eight or ten dependencies often signals that the class has too many responsibilities.

    Another mistake is creating registered services manually with new. Doing that bypasses the container and can defeat lifetime management.

    When Dependency Injection Becomes Especially Useful

    Small projects may make DI feel like additional structure. Its value grows rapidly as applications expand.

    Testing becomes easier because I can replace a real implementation with a fake or mock implementation. Business logic becomes less tied to databases, APIs, email providers, or storage systems.

    Configuration also becomes cleaner. I can replace one implementation centrally rather than editing every class that creates it.

    Most importantly, dependencies become visible. A constructor effectively documents what a class needs before it can work.

    That visibility is one reason I consider dependency injection an architectural tool rather than just an ASP.NET Core feature.

    FAQs

    1. What is dependency injection in ASP.NET Core?

    Dependency injection lets ASP.NET Core create registered services and supply them to classes that depend on them.

    2. What are the three dependency injection lifetimes in ASP.NET Core?

    The three standard lifetimes are Transient, Scoped, and Singleton, which control how long service instances remain available.

    3. Why is constructor injection recommended in ASP.NET Core?

    Constructor injection makes required dependencies explicit, supports testing, reduces coupling, and prevents classes from constructing their own dependencies.

    4. Can a Singleton depend on a Scoped service?

    Directly capturing a Scoped service inside a Singleton creates a lifetime mismatch and should generally be avoided.

    Stop Creating Everything With new

    Once Dependency injection in ASP.NET Core explained clicked for me, the feature stopped feeling like framework magic. It became a predictable system: register a service, choose the right lifetime, request the abstraction, and let the container resolve the implementation.

    The lifetime decision deserves the most attention. Transient means new instances, Scoped normally means one instance per web request, and Singleton means one shared instance.

    My next step on any project is simple: inspect classes that manually construct repositories, clients, or business services. Those are often the best candidates for DI. Keep dependencies explicit, keep lifetimes compatible, and the application becomes much easier to change without creating a chain reaction across the codebase.

  • How to Add JavaScript to HTML for Better Web Performance

    How to Add JavaScript to HTML for Better Web Performance

    Building web pages brings so much excitement until our static site needs interactive buttons, dynamic forms, or live updates. Learning how to add JavaScript to HTML is the exact moment our static page transforms into a living web application. We have all struggled through broken scripts and blank screens early in our web development journey, so let us break down this process together cleanly and simply.

    Key Takeaways

    • Connecting JavaScript to HTML requires choosing the right embedding strategy for your project goals.
    • External scripts keep our code clean, maintainable, and easy to cache across multiple web pages.
    • Using defer prevents render-blocking bugs and ensures elements load before your script executes.
    • Modern ES6 modules simplify component building by supporting native import and export statements.
    • Browser Developer Tools give us instant diagnostic feedback whenever scripts fail to load properly.

    Understanding the Role of Script Tags

    Every browser relies on specific markup elements to interpret programming logic alongside structural tags.

    We rely on the HTML script tag to tell web browsers where executable programming logic lives inside our web document structure. This tag acts as a universal bridge, allowing client-side scripts to manipulate elements, listen for user mouse clicks, and send background network requests seamlessly.

    When web browsers scan our HTML files from top to bottom, encountering a script tag pauses document parsing until that script finishes loading. Understanding this sequence helps us write cleaner code while avoiding page speed penalties that hurt user experience and search engine rankings.

    Using Internal JavaScript Inside Your Markup

    Writing code directly within HTML files works well for quick experiments and small single-page projects.

    Internal JavaScript places raw programming code directly between an opening and closing script tag inside our main HTML file. We can place this block inside either the head or body sections depending on when we want the logic to execute during document parsing.

    This method shines when prototyping quick ideas because everything remains contained in a single document. However, mixing logic with markup makes larger projects difficult to maintain and prevents web browsers from caching our code for faster repeat page visits.

    Linking External JavaScript Files for Clean Code

    Linking External JavaScript Files for Clean Code

    Separating programming logic from document layout remains the primary industry standard across modern software development.

    Linking external scripts involves creating a standalone file with a .js extension and referencing it inside our HTML using the src attribute. This clean approach ensures our HTML stays readable while allowing multiple web pages to share the exact same script file effortlessly.

    Browser caching takes full advantage of external files by storing them locally after the first visit. This significantly speeds up load times across our entire website while keeping our source code organized into modular, reusable components according to official web standards.

    Modern Techniques Competitors Miss: Async, Defer, and ES6 Modules

    Optimizing script loading sequence prevents frustrating blank screens and delivers blazing fast page speeds.

    Stopping Render-Blocking with Defer and Async

    Choosing the correct loading attribute dramatically improves real-world loading speed and core web vitals.

    The defer attribute tells the browser to download our script in the background while continuing to render HTML elements. The script only executes after the browser finishes parsing the complete document, making it ideal for scripts that depend on existing DOM elements.

    The async attribute downloads the script in the background but executes it immediately upon arrival, pausing HTML parsing briefly. This attribute works best for independent third-party scripts like Google Analytics or advertisement trackers where element manipulation order does not matter.

    Embracing Modern JavaScript with ES6 Modules

    Embracing Modern JavaScript with ES6 Modules

    Modular architecture allows developers to structure complex applications into clean, independent code chunks.

    Adding type=”module” to our script tag enables modern ES6 module imports and exports directly inside the browser. Modules automatically run in strict mode, scoped locally to prevent global variable pollution across our codebase.

    Modern modules automatically enforce deferred execution behavior without requiring additional attributes. This modern approach allows us to import helper functions across multiple JavaScript files cleanly without polluting global memory.

    As projects grow beyond basic JavaScript, developers may also explore typescript union and intersection types to describe flexible data structures while keeping reusable modules more predictable. These type features are especially useful when functions or components need to accept multiple related data shapes without sacrificing code clarity.

    Handling DOM Events with DOMContentLoaded

    Executing code before elements exist on the page causes classic null target errors for beginner developers.

    Wrapping script execution inside a DOMContentLoaded event listener guarantees that our HTML document structure fully loads before running interactive logic. This safeguards our scripts against missing element reference errors when scripts are placed in the head tag without defer.

    We can attach event listeners directly to the window object to manage setup routines smoothly. This practice builds bulletproof interactive features regardless of where our team decides to place script tags across different site templates.

    Step-by-Step Guide on How to Add JavaScript to HTML

    Implementing interactive features step-by-step builds solid practical muscle memory for beginner web developers.

    First, create a separate file named script.js for your code. Then link it in your HTML using the src attribute inside the script tag. Place this tag right before the closing </body> tag so it does not slow down your website rendering.

    HTML

    <!DOCTYPE html>

    <html>

    <head>

        <title>My Webpage</title>

    </head>

    <body>

        <h1>Hello World</h1>

        <!– Link your external JS file here –>

        <script src=”script.js”></script>

    </body>

    </html>

    Second, if you only have a few lines of code, write them directly between the opening <script> and closing </script> tags inside your body element.

    HTML

    <body>

        <h1>Hello World</h1>

        <script>

            console.log(“This runs directly in the HTML!”);

        </script>

    </body>

    Third, if you prefer to place your external script tags inside the <head> section, always add the defer attribute. This tells the browser to download the script in the background and run it after the layout finishes loading.

    HTML

    <head>

        <!– Safely loads from the head without blocking the page –>

        <script src=”script.js” defer></script>

    </head>

    Summary of Best Practices: Keep HTML and JavaScript in separate files to stay organized. Load scripts at the end of the body or use defer to make your site load faster. Use async instead of defer only if the script is completely independent like third-party analytics.

    Debugging and Best Practices for JavaScript Integration

    Debugging and Best Practices for JavaScript Integration

    Following established industry guidelines saves hours of troubleshooting broken scripts and non-responsive page elements.

    Troubleshooting Common Browser Console Errors

    Browser console diagnostic tools help us pinpoint syntax bugs and path typos instantly.

    A 404 error in the browser console usually means our script file path inside the src attribute is incorrect. Double-checking directory folder structures and file spelling fixes the majority of missing script connection issues immediately.

    Uncaught ReferenceError message indicates our code tried to select an HTML element before the browser created it. Adding the defer attribute or moving script tags just before the closing body tag resolves DOM loading race conditions.

    Essential Best Practices for Clean Web Architecture

    Adhering to clean coding standards keeps web applications fast, accessible, and easily maintainable.

    Keep script files small and modular by splitting unrelated logic into separate external files. Single responsibility files simplify team collaboration, unit testing, and long-term project maintenance across large engineering teams.

    Developers working with front-end frameworks should also understand what is bootstrap in web development and how its JavaScript components integrate with HTML. Knowing how framework scripts are loaded helps prevent broken dropdowns, modals, navigation menus, and other interactive components while keeping the project structure organized.

    Avoid legacy inline event handlers like onclick directly inside HTML tags because they clutter markup files. Modern web architecture emphasizes separation of concerns by binding event listeners exclusively inside external JavaScript files.

    Frequently Asked Questions

    1. How to add JavaScript in HTML code?

    To add JavaScript in HTML code, insert the script tag inside your file. You can either write your code directly between the opening and closing script tags or reference an external file using the src attribute for better project structure.

    2. How do I import JavaScript code into HTML?

    You import JavaScript code into HTML by using the script tag with a src attribute pointing to your JS file path. Adding the defer attribute inside the script tag ensures your HTML content loads completely before running external code.

    3. How can I enable JavaScript in HTML?

    JavaScript runs automatically inside web browsers without needing extra configuration. To ensure your code executes in your HTML file, verify that script tags use valid syntax, reference correct relative file paths, and contain no script blocking syntax errors.

    4. How to display JavaScript in HTML?

    Display JavaScript output in HTML by targeting specific elements using document.getElementById() or document.querySelector(). Once targeted, update the element’s textContent or innerHTML properties to render dynamic data, calculation results, or interactive text directly on screen.

    Time to Bring Your Static Web Pages to Life!

    Mastering how to add JavaScript to HTML is your ultimate stepping stone toward becoming a full-stack developer. By keeping script files separate, leveraging the defer attribute, and writing modular functions, you will build faster and cleaner web applications. Go ahead and start linking your scripts today to deliver interactive experiences your visitors will truly love!

  • How to Build a REST API in ASP.NET Core: 7 Easy Steps

    How to Build a REST API in ASP.NET Core: 7 Easy Steps

    The first time I had to figure out how to build a REST API in ASP.NET Core, the HTTP methods were not the difficult part. The real challenge was deciding how models, database access, dependency injection, routing, and responses should fit together.

    A good API should do more than return JSON. It should expose predictable URLs, use correct HTTP status codes, validate requests, handle failures cleanly, and remain easy to extend.

    I will use a simple product catalog to show the complete flow.

    Choose Controllers or Minimal APIs First

    Before writing an endpoint, I decide which ASP.NET Core API style suits the project.

    ASP.NET Core supports both Minimal APIs and controller-based APIs. Microsoft currently recommends Minimal APIs for many new projects because they need less configuration and provide a concise approach to HTTP endpoints. Controllers remain useful when I want traditional object-oriented organization, attributes, filters, and clearly separated controller classes.

    For this example, I use controllers because they make every part of the REST architecture easy to see.

    For a small microservice, I might choose Minimal APIs instead.

    Step 1: Create an ASP.NET Core Web API Project

    Step 1 Create an ASP.NET Core Web API Project

    The quickest way I create a controller-based project is with the .NET CLI:

    dotnet new webapi –use-controllers -o ProductApi

    cd ProductApi

    The –use-controllers option matters. Current ASP.NET Core tooling can create Minimal API projects by default, so this flag explicitly requests the controller architecture. Microsoft documents the same controller-based project approach in its Web API tutorial.

    Two files deserve immediate attention.

    Program.cs controls dependency injection, middleware, endpoint mapping, and application startup.

    appsettings.json provides a standard location for configuration such as connection strings and environment-specific settings.

    Understanding these files early makes how to build a REST API in ASP.NET Core much less confusing.

    Step 2: Create the Product Data Model

    Step 2 Create the Product Data Model

    I normally create a Models directory and add Product.cs.

    namespace ProductApi.Models

    {

        public class Product

        {

            public int Id { get; set; }

            public string Name { get; set; } = string.Empty;

            public decimal Price { get; set; }

            public string Description { get; set; } = string.Empty;

        }

    }

    This model represents the resource the API manages.

    A request such as:

    GET /api/products/5

    should return one representation of that product, normally as JSON.

    I keep beginner models simple. In a production application, I usually introduce request and response DTOs instead of exposing database entities directly.

    That separation becomes valuable when validation rules and public API contracts start changing.

    Step 3: Configure Entity Framework Core

    Step 3 Configure Entity Framework Core

    For a compact demonstration, install Microsoft’s EF Core InMemory provider:

    dotnet add package Microsoft.EntityFrameworkCore.InMemory

    Then create Data/ApiDbContext.cs:

    using Microsoft.EntityFrameworkCore;

    using ProductApi.Models;

    namespace ProductApi.Data

    {

        public class ApiDbContext : DbContext

        {

            public ApiDbContext(DbContextOptions<ApiDbContext> options)

                : base(options) { }

            public DbSet<Product> Products { get; set; }

        }

    }

    ApiDbContext gives Entity Framework Core access to the products collection while ASP.NET Core’s dependency injection system supplies the configured context.

    Why I Use InMemory Only for the Demo

    This distinction gets missed in many beginner tutorials.

    Microsoft explicitly states that its EF Core InMemory provider is not designed for production use. It is neither built for robustness nor production database performance.

    I use it here because it removes database setup from the learning exercise.

    For a real application, I would normally switch to SQL Server, PostgreSQL, or another supported database provider.

    Step 4: Register Services and OpenAPI

    Step 4 Register Services and OpenAPI

    Next, I configure Program.cs:

    using Microsoft.EntityFrameworkCore;

    using ProductApi.Data;

    var builder = WebApplication.CreateBuilder(args);

    builder.Services.AddControllers();

    builder.Services.AddDbContext<ApiDbContext>(options =>

        options.UseInMemoryDatabase(“ProductList”));

    builder.Services.AddOpenApi();

    var app = builder.Build();

    if (app.Environment.IsDevelopment())

    {

        app.MapOpenApi();

    }

    app.UseHttpsRedirection();

    app.UseAuthorization();

    app.MapControllers();

    app.Run();

    This is one of the most important stages when learning how to build a REST API in ASP.NET Core.

    AddControllers() registers controller support.

    AddDbContext() registers the database context through dependency injection.

    AddOpenApi() enables OpenAPI document generation. ASP.NET Core supports OpenAPI generation for controller-based and Minimal API applications.

    MapControllers() then connects incoming HTTP requests with controller routes.

    Step 5: Create RESTful CRUD Endpoints

    Create Controllers/ProductsController.cs.

    Start with the controller definition:

    [ApiController]

    [Route(“api/[controller]”)]

    public class ProductsController : ControllerBase

    {

        private readonly ApiDbContext _context;

        public ProductsController(ApiDbContext context)

        {

            _context = context;

        }

    }

    ProductsController produces the route /api/products.

    The [ApiController] attribute also enables API-focused behavior. Microsoft documents controller APIs as classes derived from ControllerBase.

    GET Endpoints

    To return every product:

    [HttpGet]

    public async Task<ActionResult<IEnumerable<Product>>> GetProducts()

    {

        return await _context.Products.ToListAsync();

    }

    To retrieve one product:

    [HttpGet(“{id}”)]

    public async Task<ActionResult<Product>> GetProduct(int id)

    {

        var product = await _context.Products.FindAsync(id);

        if (product == null)

            return NotFound();

        return product;

    }

    Notice the 404 Not Found response. REST API design is not only about performing operations. Clients also need meaningful HTTP responses.

    POST, PUT, and DELETE Endpoints

    A create endpoint can return 201 Created:

    [HttpPost]

    public async Task<ActionResult<Product>> PostProduct(Product product)

    {

        _context.Products.Add(product);

        await _context.SaveChangesAsync();

        return CreatedAtAction(

            nameof(GetProduct),

            new { id = product.Id },

            product);

    }

    I would then map PUT /api/products/{id} to updating an existing record and DELETE /api/products/{id} to removing one.

    That gives the API the core CRUD pattern:

    GET     /api/products

    GET     /api/products/{id}

    POST    /api/products

    PUT     /api/products/{id}

    DELETE  /api/products/{id}

    This predictable resource-based design is the part of how to build a REST API in ASP.NET Core that matters beyond ASP.NET itself.

    Step 6: Run and Test the ASP.NET Core API

    Run the application:

    dotnet run

    The terminal displays the local HTTP or HTTPS address.

    I test every endpoint independently rather than assuming CRUD works because the application compiled.

    For example:

    curl https://localhost:7123/api/products

    I also test invalid IDs, malformed requests, duplicate operations, and missing fields.

    Postman, Visual Studio .http files, curl, or another API client all work well.

    Testing failure paths early catches more useful problems than repeatedly testing a successful GET.

    Step 7: Prepare the REST API for Production

    A CRUD demo is only the foundation.

    When I move from a tutorial API toward production, I add input validation, DTOs, centralized error handling, authentication, authorization, logging, database migrations, pagination, rate controls, and automated tests.

    Security headers may also matter when the API is part of a browser-facing application. Understanding how to create a content security policy is particularly useful when an ASP.NET Core backend serves or supports web applications that load scripts, styles, images, and other browser resources.

    I also avoid leaking stack traces, connection details, or internal implementation information through API errors.

    For protected endpoints, there is another current ASP.NET Core behavior worth knowing. Starting with ASP.NET Core 10, known API endpoints using cookie authentication return 401 or 403 responses rather than redirecting clients to login pages.

    A Small Design Choice That Prevents Bigger Problems

    One lesson I learned while building APIs is to avoid binding every public endpoint directly to the persistence model.

    It feels convenient initially:

    HTTP request → Product entity → database

    But that creates tight coupling.

    I prefer:

    HTTP request → ProductRequest DTO → Product entity → ProductResponse DTO

    That extra boundary lets me change database fields without unexpectedly changing the API contract.

    It also prevents clients from submitting properties they should never control.

    This is one improvement I would make immediately after learning how to build a REST API in ASP.NET Core, even for a relatively small project.

    REST API Questions Developers Often Ask

    1. How do I build a CRUD REST API in ASP.NET Core?

    Create a Web API project, define models, configure storage, register services, create GET, POST, PUT, and DELETE endpoints, then test each response.

    2. Should I use Controllers or Minimal APIs in ASP.NET Core?

    Microsoft recommends Minimal APIs for many new projects, while controllers remain useful for structured applications that benefit from controller conventions and organization.

    3. Can ASP.NET Core REST APIs use SQL Server?

    Yes. Replace the InMemory provider with an EF Core SQL Server provider, configure the connection string, and manage schema changes through migrations.

    4. Is Swagger the same as OpenAPI in ASP.NET Core?

    Not exactly. OpenAPI is the API description specification, while Swagger commonly refers to tooling used to visualize or interact with OpenAPI-described APIs.

    Your API Works. Now Make It Production-Worthy

    Learning how to build a REST API in ASP.NET Core becomes much easier once I stop treating the project as one large coding task. I separate it into resources, persistence, services, routes, HTTP responses, and testing.

    The product example gives you a working foundation, but I would not stop at CRUD.

    My next step would be replacing the temporary InMemory database, adding DTO validation, standardizing error responses, securing endpoints, and writing integration tests. That is where a tutorial API starts becoming an API I would trust in a real application.

  • How to Import a CSV File Into PostgreSQL pgAdmin Without Errors

    How to Import a CSV File Into PostgreSQL pgAdmin Without Errors

    Importing spreadsheet data into PostgreSQL does not have to involve complicated scripts or third-party tools. When I need to move customer records, product information, reports, or other structured data from a CSV into a database, pgAdmin’s graphical Import/Export Data tool is one of the easiest options.

    If you’re wondering how to import a CSV file into PostgreSQL pgAdmin, the process starts with creating a compatible target table. From there, you select the file, configure its delimiter and header settings, run the import, and verify the results. The details matter, though, because incorrect data types, encoding, or column mapping can stop an otherwise simple import.

    What Should You Check Before Importing a CSV Into PostgreSQL?

    Before touching the Import button, open your CSV and inspect its structure. Your PostgreSQL table needs columns that correspond to the fields you plan to import, with compatible data types.

    For example, your CSV might contain:

    id,name,email,created_at

    1,John Smith,john@example.com,2026-08-01

    2,Sarah Lee,sarah@example.com,2026-08-02

    A matching PostgreSQL table could be:

    CREATE TABLE customers (

        id INTEGER PRIMARY KEY,

        name VARCHAR(100),

        email VARCHAR(255),

        created_at DATE

    );

    Check the CSV header, column order, delimiter, encoding, date formats, and empty values before importing. I generally use UTF-8 encoding and ISO dates such as 2026-08-01 because they reduce compatibility problems.

    Your table does not always need the exact same total number of columns as the CSV. pgAdmin’s Columns tab lets you select specific destination columns, which is useful when the table contains an auto-generated ID, default timestamp, or nullable field that is absent from the file.

    How Do You Create a Matching Table in pgAdmin?

    How Do You Create a Matching Table in pgAdmin

    You can create the destination table graphically without writing SQL.

    Open pgAdmin and connect to your PostgreSQL database. Expand your database and schema, right-click Tables, choose Create, and then select Table. Enter your table name and open the Columns tab.

    If you also work with SQLite in Python projects, understanding how to fix the <a href=”/sqlite-database-is-locked-error-in-python”>SQLite Database Is Locked Error in Python</a> can help you resolve database locking issues caused by concurrent connections or unclosed transactions.

    Add the required columns one at a time and choose an appropriate PostgreSQL data type for each field. For example, names can use VARCHAR, whole numbers can use INTEGER, monetary amounts can use NUMERIC, and dates can use DATE.

    Click Save when the structure is ready.

    Alternatively, open the Query Tool and execute a CREATE TABLE statement. SQL is often faster when you already know the required schema.

    How to Import a CSV Into PostgreSQL Using pgAdmin Step by Step

    Step 1: Find the Target PostgreSQL Table

    After connecting to your server, navigate through your database, schema, and Tables section. Locate the table you created for the CSV data.

    Right-click the table and select Import/Export Data.

    Step 2: Select Import Mode and Your CSV File

    In the General tab, switch the Import/Export option to Import.

    Use the ellipsis button beside Filename to locate your CSV file. Set Format to csv and select UTF8 as the encoding when your source file uses UTF-8.

    Choosing the correct encoding is especially important when customer names, addresses, product descriptions, or other text contains special characters.

    Step 3: Configure the CSV Header and Delimiter

    Open the Options tab.

    Set Header to Yes when the first row contains field names such as id,name,email. This tells PostgreSQL not to treat those labels as actual database records.

    For a standard comma-separated file, set the delimiter to a comma.

    CSV files can also contain commas inside individual values:

    1,”Austin, Texas”,250

    Quotation marks allow PostgreSQL to recognize “Austin, Texas” as one field instead of two separate columns.

    Step 4: Map the CSV Columns

    Open the Columns tab when you need to control which fields pgAdmin imports.

    This is particularly helpful when PostgreSQL automatically generates a primary key or timestamp that does not exist in the source file. Select only the table columns represented in your CSV (Comma-separated values) and ensure their order corresponds to the incoming data.

    Step 5: Run the PostgreSQL CSV Import

    Review your settings and click OK.

    pgAdmin will execute the import and display its status through the Process Watcher. If the operation fails, inspect the reported error instead of repeatedly running the same import. PostgreSQL error messages often reveal whether the problem involves data types, delimiters, permissions, or column counts.

    How Do You Verify CSV Data After Importing It?

    Never assume the data is correct just because pgAdmin reports a successful import.

    Right-click your table and choose View/Edit Data → All Rows, or open the Query Tool and execute:

    SELECT * FROM customers

    LIMIT 10;

    I also check the total number of imported records:

    SELECT COUNT(*)

    FROM customers;

    Compare that count with the expected number of CSV data rows. Then inspect several records to ensure dates, names, numbers, and other values landed in the correct columns.

    Why Does a PostgreSQL CSV Import Fail in pgAdmin?

    Why Does a PostgreSQL CSV Import Fail in pgAdmin

    Why Do You Get “Extra Data After Last Expected Column”?

    This usually means a CSV row contains more fields than PostgreSQL expects. Look for extra delimiters, trailing commas, or commas inside text that are not enclosed in quotation marks.

    Why Does PostgreSQL Show “Missing Data for Column”?

    This error generally means a row contains fewer fields than the selected destination columns. Compare the problematic CSV row with your table structure and verify your delimiter settings.

    How Do You Fix Invalid Input Syntax?

    PostgreSQL cannot insert text into an incompatible field. For example, $1,250.00 may fail in a numeric column because it contains a dollar sign and comma.

    Clean inconsistent values before importing or load them into a staging table as text so you can transform and validate them first.

    How Do You Fix Duplicate Key Errors?

    A duplicate key violation occurs when an imported value already exists in a primary key or unique field.

    The pgAdmin CSV importer does not automatically perform an upsert. For recurring imports, I prefer loading records into a staging table and then using INSERT … ON CONFLICT to determine whether PostgreSQL should ignore or update duplicate records.

    How Do You Fix CSV Encoding Errors?

    If PostgreSQL reports invalid byte sequences or character encoding errors, confirm that the source CSV is actually saved as UTF-8 and that UTF8 is selected during import.

    Should You Use pgAdmin, COPY, or \copy for CSV Files?

    The graphical pgAdmin importer is ideal for occasional manual imports, especially when you want to avoid command-line tools.

    PostgreSQL also provides the server-side COPY command:

    COPY customers

    FROM ‘/server/path/customers.csv’

    WITH (

        FORMAT CSV,

        HEADER TRUE,

        DELIMITER ‘,’

    );

    The important difference is file access. COPY reads from the database server’s file system, so the PostgreSQL server must be able to access the specified location.

    The \copy command in psql reads from the client machine instead:

    \copy customers FROM ‘C:/data/customers.csv’

    WITH (FORMAT CSV, HEADER TRUE);

    For small manual jobs, I prefer pgAdmin. For local command-line imports, \copy is convenient, while server-side COPY can be better suited to controlled bulk-loading workflows.

    What’s the Safest Way to Import a Large CSV Into PostgreSQL?

    For large or business-critical datasets, consider importing into a staging table first. A staging table gives you room to identify duplicates, normalize dates, validate numeric fields, and remove malformed records before inserting them into production tables.

    Back up important data before a major import and test the process with a small sample first. These simple precautions can prevent a minor formatting issue from becoming a much larger database problem.

    Frequently Asked Questions About pgAdmin CSV Imports

    1. What is the easiest way for how to import a CSV file into PostgreSQL pgAdmin?

    Create a compatible target table, right-click it, choose Import/Export Data, select Import, choose your CSV, configure the header and delimiter, map the required columns, and click OK.

    2. Does pgAdmin automatically create a PostgreSQL table from CSV?

    No. The standard Import/Export Data workflow expects an existing destination table. Create the appropriate table and data types before running the import.

    3. Can I import only selected CSV columns into PostgreSQL?

    Yes. The Columns tab lets you specify the destination columns involved in the import. This is useful when the table contains automatically generated or default fields.

    4. Why can’t pgAdmin find my CSV file?

    File-access problems can occur when pgAdmin, PostgreSQL, a container, or a remote server does not have access to the location where the CSV is stored. Check the environment, path, and relevant file permissions.

    Make Your Next PostgreSQL CSV Import Trouble-Free

    Once I understand the relationship between the CSV structure and the PostgreSQL table, importing data becomes much easier. I check the columns, data types, delimiter, header, encoding, and date formats before starting, then verify the records immediately afterward.

    Learning how to import a CSV file into PostgreSQL pgAdmin is especially useful for quick manual data migrations and one-time uploads. When imports become larger or recurring, I move toward staging tables, COPY, or \copy for greater control and reliability.

  • How to Prevent Session Fixation Attacks in Web Apps

    How to Prevent Session Fixation Attacks in Web Apps

    A successful login should never turn an old anonymous session into a trusted authenticated session without changing its identity. When I review authentication flows, that is one of the first checks I make. Understanding How to prevent session fixation attacks starts with one rule: generate a fresh session identifier whenever the user’s trust level changes.

    Session fixation differs from classic session hijacking. Instead of stealing a session after login, an attacker gets a known session identifier accepted before authentication. The victim then logs in using it. If the application keeps that identifier, the attacker may reuse it as an authenticated session. OWASP describes this unchanged pre-login and post-login session value as the core weakness behind session fixation.

    How Session Fixation Attacks Actually Work

    How Session Fixation Attacks Actually Work

    Imagine an online account creates session ABC123 for an anonymous visitor.

    An attacker obtains that valid session and gets a victim’s browser to use it. The victim then enters valid credentials.

    The vulnerable flow looks like this:

    Anonymous ABC123 → Login → Authenticated ABC123

    The attacker already knows ABC123. If the server now associates that same identifier with the victim’s authenticated account, the attacker may gain access.

    The secure flow is different:

    Anonymous ABC123 → Login → Authenticated X9K72P

    The old session identifier becomes useless.

    This distinction matters because HTTPS alone cannot correct poor session lifecycle management. OWASP states that session ID regeneration is mandatory for preventing session fixation.

    Regenerate Session IDs After Authentication

    Regenerate Session IDs After Authentication

    The strongest direct defense is also straightforward: destroy or invalidate the previous identifier and create a new unpredictable one after successful authentication.

    I treat authentication as a hard security boundary.

    Rotate the Session During Login

    Never authenticate an existing anonymous identifier in place.

    Instead, the application should authenticate the credentials, issue a new session identifier, associate authentication state with the new session, and invalidate the previous identifier.

    Use your framework’s native session-regeneration function where possible. OWASP recommends framework-provided session management rather than homemade identifiers. If custom IDs are unavoidable, it recommends a cryptographically secure pseudorandom generator with at least 128 bits.

    My preferred design looks like this:

    Guest session → authentication → ID rotation → authenticated session

    That single transition breaks the attacker’s knowledge of the session.

    Rotate Sessions After Other Trust Changes

    Login is not the only boundary that matters.

    I also rotate session identifiers after MFA verification, password changes, account recovery, administrative elevation, and significant privilege changes.

    That creates a useful engineering rule: when trust increases, session identity changes.

    This is the original test I use during reviews because developers often protect login but overlook later privilege transitions.

    Harden Session Cookies Against Browser-Side Attacks

    Harden Session Cookies Against Browser-Side Attacks

    Session rotation addresses fixation directly. Cookie controls reduce the number of ways an attacker can manipulate, expose, or misuse sessions.

    A hardened session cookie can resemble:

    Set-Cookie: __Host-session=RANDOM_VALUE; Path=/; Secure; HttpOnly; SameSite=Lax

    MDN recommends restricting cookie access and documents Secure, HttpOnly, and SameSite as important controls. The __Host- prefix adds stricter requirements in supporting browsers: the cookie must use HTTPS, must have Path=/, and cannot specify Domain.

    Use Secure and HttpOnly

    Secure prevents browsers from transmitting the session cookie through ordinary HTTP.

    HttpOnly prevents JavaScript from reading the cookie through document.cookie. That limits session theft if an XSS weakness exists, although it does not make XSS harmless.

    Choose an Appropriate SameSite Policy

    SameSite controls when browsers attach cookies to cross-site requests.

    Strict provides stronger isolation but can disrupt legitimate cross-site flows. Lax often provides a practical baseline. Applications that genuinely require SameSite=None must also use Secure.

    These cookie settings complement the best HTTP security headers for websites, especially HSTS and Content-Security-Policy. They should form part of the same browser-security strategy.

    Force HTTPS Across the Entire Session

    Force HTTPS Across the Entire Session

    Protecting only the login page is insufficient.

    I use HTTPS from the first anonymous request through logout. OWASP recommends TLS for the entire web session because unencrypted traffic can expose or allow manipulation of session identifiers. It also recommends the Secure cookie attribute and notes that HSTS can strengthen HTTPS enforcement.

    This matters because an attacker who can manipulate an unencrypted connection may attempt to influence the victim’s session before authentication occurs.

    HTTPS protects transport. Session regeneration protects identity. You need both.

    Reject Session IDs Your Application Never Issued

    One overlooked defense is refusing arbitrary session identifiers.

    An application should not accept a random ID supplied by a client and silently convert it into a valid session.

    OWASP recommends rejecting identifiers the application never generated. Receiving one can also be treated as suspicious activity worth logging.

    This reduces an attacker’s ability to choose or inject a convenient identifier.

    Avoid transporting session IDs through URLs as well. URLs can expose identifiers through browser history, logs, bookmarks, analytics systems, Referer data, and shared links. OWASP specifically identifies URL-based identifiers as an additional disclosure and fixation risk.

    Add Session Expiration and Server-Side Invalidation

    Rotation is strongest when the old session actually dies.

    Deleting a browser cookie without invalidating the server-side session can leave an active credential behind.

    I recommend server-enforced idle and absolute timeouts. Sensitive applications may also benefit from shorter sessions and reauthentication before high-risk actions.

    Logout should terminate the server-side session rather than simply remove the local cookie.

    This creates three layers:

    Control What It Accomplishes
    Session regeneration Makes the attacker’s known ID obsolete
    Secure cookie settings Restricts exposure and manipulation
    Server-side expiration Limits how long stolen sessions remain useful
    HTTPS and HSTS Protect session transport
    Session validation Rejects unknown or malformed identifiers

    No single row should replace the others.

    How I Implement Session Fixation Protection

    I use a simple sequence when reviewing an application.

    First, I capture the session identifier before login. I authenticate normally and compare the identifier afterward. They must differ.

    Next, I test the old identifier. The server should reject it or treat it as unauthenticated.

    I repeat the test after MFA, privilege elevation, password resets, and other sensitive identity transitions.

    Then I inspect the session cookie. I verify Secure, HttpOnly, a suitable SameSite policy, tight scope, and HTTPS-only transport.

    Finally, I confirm that session identifiers cannot travel through query strings or other unnecessary channels.

    OWASP’s Web Security Testing Guide uses the same central test: determine whether session cookies remain unchanged before and after successful authentication.

    Common Session Fixation Prevention Mistakes

    The biggest mistake I see is assuming secure cookie attributes solve fixation.

    They don’t.

    HttpOnly makes cookie theft through JavaScript harder. Secure protects transport. SameSite limits certain cross-site requests. None automatically replaces a known pre-login identifier after authentication.

    Another mistake is generating a new cookie while leaving the old authenticated server session active. Rotation must invalidate the previous credential.

    Developers should also avoid predictable identifiers. OWASP recommends meaningless, unpredictable session IDs, while MITRE catalogs session fixation as CWE-384.

    The real defense comes from controlling the entire session lifecycle.

    Make the Old Session Useless—Problem Solved

    The cleanest answer to How to prevent session fixation attacks isn’t another security plugin or complicated detection rule. It is disciplined session lifecycle management.

    When authentication succeeds, replace the session identifier. When privileges increase, rotate it again. Protect the new credential with HTTPS and hardened cookies, reject identifiers you didn’t issue, and invalidate sessions properly at logout.

    My next step after implementing these controls is always the same: capture the session before and after login. If the identifier survives authentication unchanged, I treat that as a security defect until proven otherwise.

    Frequently Asked Questions

    1. Can HTTPS prevent session fixation attacks by itself?

    No. HTTPS protects session data in transit, but applications still need to regenerate session IDs after authentication.

    2. When should a website regenerate a session ID?

    Regenerate it after login and after major trust changes such as MFA, password recovery, or privilege elevation.

    3. Does SameSite prevent session fixation?

    Not by itself. SameSite limits certain cross-site cookie behaviors but does not replace session rotation after authentication.

    4. What is the best way to test how to prevent session fixation attacks?

    Compare session IDs before and after login, then confirm the old identifier cannot access the authenticated account.

  • How to Connect Supabase Database to React: A Complete Setup Guide

    How to Connect Supabase Database to React: A Complete Setup Guide

    Connecting a database to a React app often sounds more complicated than it really is. With Supabase, I can skip much of the traditional backend setup and connect a hosted PostgreSQL database to React using a lightweight JavaScript client.

    If you’re trying to understand how to connect Supabase database to React, this guide walks you through the complete setup without unnecessary detours. I’ll show you how to install the client library, configure environment variables, initialize Supabase, fetch and display data, run CRUD operations, secure access with Row Level Security, and fix the most common connection errors.

    What Do I Need to Connect Supabase to a React App?

    Before starting, I make sure Node.js and npm are installed and that I have an active Supabase project. I also need an existing React application or can create a new one with Vite.

    For a new project, I can run:

    npm create vite@latest react-supabase-app — –template react

    cd react-supabase-app

    npm install

    npm run dev

    For applications serving primarily US users, I also consider the available Supabase project region when creating the backend. Choosing infrastructure reasonably close to the application’s main audience can help reduce unnecessary network latency.

    How Do I Install the Supabase Client in React?

    Supabase provides the official @supabase/supabase-js package for interacting with its services.

    From my React project directory, I run:

    npm install @supabase/supabase-js

    This Supabase JavaScript client lets my React application communicate with database APIs and use services such as authentication and storage.

    React does not need to connect directly to PostgreSQL using a database username and password. I never place a PostgreSQL connection string or database password inside browser-side React code.

    Where Should Supabase Environment Variables Go in React?

    Where Should Supabase Environment Variables Go in React


    For a Vite application, I create .env.local in the root of the project and add the Supabase project URL and client-side key.

    VITE_SUPABASE_URL=https://your-project-id.supabase.co

    VITE_SUPABASE_ANON_KEY=your-anon-public-key

    I can obtain the appropriate project configuration from my Supabase dashboard.

    For an older Create React App project, the variables traditionally use the REACT_APP_ prefix:

    REACT_APP_SUPABASE_URL=https://your-project-id.supabase.co

    REACT_APP_SUPABASE_ANON_KEY=your-anon-public-key

    After editing the environment file, I restart the development server.

    Are Supabase Environment Variables Secret in React?

    This is where I think many beginner tutorials need additional explanation. Putting a value in .env.local prevents me from repeatedly hardcoding it in source files, but variables exposed to client-side JavaScript should not be treated as secrets.

    A Supabase publishable key or legacy anon key is intended for frontend use when paired with appropriate security controls. I never put a service-role key in a React frontend because it provides elevated access.

    Row Level Security, authentication, and carefully designed policies should protect the underlying data.

    How Do I Initialize the Supabase Client?

    I create src/supabaseClient.js and initialize a reusable client instance:

    import { createClient } from ‘@supabase/supabase-js’;

    const supabaseUrl = import.meta.env.VITE_SUPABASE_URL;

    const supabaseAnonKey = import.meta.env.VITE_SUPABASE_ANON_KEY;

    export const supabase = createClient(

      supabaseUrl,

      supabaseAnonKey

    );

    Keeping this configuration in a dedicated file makes the Supabase React integration easier to maintain because components can import the same client instead of creating new instances repeatedly.

    How Do I Fetch and Display Supabase Data in React?

    How Do I Fetch and Display Supabase Data in React


    Knowing how to connect Supabase database to React is more useful when I can prove that the connection actually works.

    Suppose my database contains an items table with id and name columns. I can fetch and display those records using useEffect and useState:

    import { useEffect, useState } from ‘react’;

    import { supabase } from ‘./supabaseClient’;

    export default function App() {

      const [data, setData] = useState([]);

      const [loading, setLoading] = useState(true);

      const [errorMessage, setErrorMessage] = useState(”);

      useEffect(() => {

        async function fetchData() {

          const { data: items, error } = await supabase

            .from(‘items’)

            .select(‘*’);

          if (error) {

            console.error(‘Error fetching data:’, error);

            setErrorMessage(error.message);

          } else {

            setData(items);

          }

          setLoading(false);

        }

        fetchData();

      }, []);

      if (loading) return <p>Loading…</p>;

      if (errorMessage) return <p>{errorMessage}</p>;

      if (!data.length) return <p>No items found.</p>;

      return (

        <div>

          <h1>Database Items</h1>

          <ul>

            {data.map((item) => (

              <li key={item.id}>{item.name}</li>

            ))}

          </ul>

        </div>

      );

    }

    This example is more useful than simply logging the response because I can see loading, error, empty, and successful states directly in the application.

    How Do I Create, Update, and Delete Supabase Data From React?

    Once select() works, I can build a React Supabase CRUD application.

    For example, I can insert a record with:

    const { data, error } = await supabase

      .from(‘items’)

      .insert([{ name: ‘New item’ }])

      .select();

    Supabase also provides update() and delete() methods. That means I can implement create, read, update, and delete functionality through the JavaScript client without manually creating a traditional REST API for every basic operation.

    I still treat authorization as a database-level concern. Frontend validation alone should never decide whether a user has permission to modify sensitive records.

    Why Is Supabase Returning an Empty Array in React?

    If my connection appears successful but no records appear, I check the table name, confirm that the table contains data, and inspect its Row Level Security policies.

    Supabase uses PostgreSQL Row Level Security (RLS) to determine which rows a request can access. When RLS is enabled without a policy that permits the requested operation, the frontend may not receive the data I expect.

    If you’re also working with local databases, understanding how to fix the <a href=”/sqlite-database-is-locked-error”>SQLite Database Is Locked Error</a> can help you resolve access issues caused by concurrent connections and locked database files.

    Instead of permanently disabling RLS to solve the problem, I create policies that match the application’s access model. For example, an authenticated user might only receive records associated with that user’s ID.

    How Do I Fix Common Supabase React Connection Errors?

    How Do I Fix Common Supabase React Connection Errors

    Why Does Vite Say the Supabase URL Is Required?

    I verify that .env.local is in the project root, confirm the variable starts with VITE_, check its spelling, and restart the Vite server. Vite variables are accessed through import.meta.env.

    Why Is My Supabase API Key Invalid?

    I check that the client-side key belongs to the correct Supabase project and hasn’t been copied with extra characters or spaces. I also confirm that I haven’t accidentally used the wrong credential.

    Why Can React Read Data but Not Insert It?

    I inspect the RLS policies for the table. A policy that permits SELECT does not automatically grant permission to INSERT, UPDATE, or DELETE.

    Why Does My Supabase Query Return No Records?

    I verify the table and schema, check whether records exist, review query filters, and inspect RLS. An empty result doesn’t automatically mean the Supabase client failed to connect.

    Can I Use Supabase With React and TypeScript?

    Yes. I can use Supabase with a Vite React TypeScript application and take advantage of generated database types. Type-safe queries can improve autocomplete and catch incorrect field names or incompatible values earlier in development.

    For larger production applications, I find this particularly helpful because the frontend becomes easier to maintain as the database schema grows.

    FAQs About React and Supabase

    1. What is the easiest way to learn how to connect Supabase database to React?

    Start with a Vite React project, install @supabase/supabase-js, configure the project URL and client-side key, initialize createClient(), and test the setup with a simple select() query before adding authentication or advanced features.

    2. Do I need a separate backend server for React and Supabase?

    Not necessarily. React can use Supabase APIs for many database, authentication, and storage tasks. Sensitive or privileged operations may still require trusted server-side logic.

    3. Is the Supabase anon key safe in a React application?

    A publishable or legacy anon key is designed for client-side use, but it should be paired with correctly configured RLS policies. Never expose a service-role key in frontend code.

    4. Can Supabase handle CRUD operations from React?

    Yes. The Supabase JavaScript client supports selecting, inserting, updating, and deleting database records, subject to the database’s permissions and RLS policies.

    From First Query to a Production-Ready React App

    When I connect React to Supabase, I start small. I configure the client, query one table, and make sure loading, errors, and results behave correctly before adding authentication, real-time subscriptions, storage, or more complicated CRUD functionality.

    The connection itself is only part of a production-ready setup. Secure RLS policies, appropriate client-side credentials, useful error handling, and clear database permissions matter just as much. With those pieces in place, Supabase gives me a practical way to build PostgreSQL-backed React applications without creating unnecessary backend infrastructure for every basic database operation.

  • How to Create a Content Security Policy That Works

    How to Create a Content Security Policy That Works

    The hardest part of learning how to create a content security policy is not writing the header. It is deciding exactly what your website should trust without breaking features your users depend on.

    I have found that CSP works best when I treat it as an allowlist that becomes stricter over time. Starting with an oversized policy defeats much of its value. Starting too aggressively can break analytics, payments, fonts, images, or application requests.

    A better approach is to discover what the site uses, test restrictions safely, then enforce only what has been verified.

    What a Content Security Policy Actually Controls

    What a Content Security Policy Actually Controls

    A Content Security Policy, or CSP, tells browsers which sources may provide scripts, styles, images, frames, fonts, and network connections.

    The browser receives those rules through the Content-Security-Policy HTTP response header. It then blocks resources that violate them.

    This matters because many Cross-Site Scripting attacks depend on getting unauthorized JavaScript to execute. A strong CSP can stop that script even when another vulnerability exists.

    MDN describes CSP as an added security layer designed to detect and mitigate attacks such as XSS and data injection. OWASP also recommends CSP as defense in depth rather than a replacement for secure coding.

    CSP should therefore sit beside secure cookies, input handling, output encoding, authentication controls, and measures that prevent session fixation attacks.

    How to Create a Content Security Policy Step by Step

    How to Create a Content Security Policy Step by Step

    My preferred method for how to create a content security policy is progressive tightening. I do not begin by guessing which domains should be trusted.

    Step 1: Inventory Every Resource Your Pages Load

    First, I identify everything a typical page requests.

    That includes JavaScript bundles, CSS files, fonts, images, API connections, analytics platforms, payment services, embedded videos, and third-party frames.

    Browser developer tools make this easier. The Network panel reveals requests that are easy to overlook.

    Pay special attention to services such as Google Analytics, Google Tag Manager, Stripe, YouTube, external CDNs, and hosted font providers.

    This inventory becomes the foundation of the policy.

    Step 2: Build a Restrictive CSP Baseline

    When I am deciding how to create a content security policy, I prefer to begin with narrow permissions instead of broad wildcards.

    A restrictive starting point might look like this:

    Content-Security-Policy: default-src ‘none’; script-src ‘self’; connect-src ‘self’; img-src ‘self’; style-src ‘self’; frame-ancestors ‘none’; form-action ‘self’;

    default-src ‘none’ blocks resources unless another directive allows them.

    script-src ‘self’ permits JavaScript from the same origin. connect-src ‘self’ controls connections such as Fetch, XMLHttpRequest, and WebSockets.

    frame-ancestors ‘none’ prevents other sites from embedding the page in a frame. This also provides protection against many clickjacking scenarios.

    form-action ‘self’ limits where forms can submit data.

    Step 3: Allow Only Required Third-Party Sources

    Real websites rarely use only first-party resources.

    Suppose my site loads its own scripts but uses an approved analytics provider and an external image host. I can expand specific directives instead of relaxing the entire policy.

    For example:

    Content-Security-Policy: default-src ‘self’; script-src ‘self’ https://analytics.example.com; img-src ‘self’ https://images.example.com; frame-ancestors ‘none’;

    The key principle is precision.

    I avoid policies such as script-src https: because they can trust far more sources than intended. A CSP becomes weaker every time broad permissions are added for convenience.

    Step 4: Test With Content-Security-Policy-Report-Only

    One lesson I learned quickly about how to create a content security policy is that production should not be the testing environment.

    A strict policy may silently block a checkout script or stop an API request. That can turn a security improvement into a revenue problem.

    Instead, I deploy:

    Content-Security-Policy-Report-Only: …

    Report-Only mode records violations without enforcing the restrictions.

    I then test important user journeys such as login, registration, checkout, search, contact forms, video playback, dashboards, and account settings.

    Violations can appear in browser developer tools. For larger sites, CSP reports can also be sent to a reporting endpoint.

    My practical rule is simple: do not whitelist a blocked source merely because it generated a violation. First determine why the browser requested it.

    That distinction helps uncover forgotten third-party scripts and unwanted dependencies.

    Step 5: Replace unsafe-inline With Nonces

    Step 5 Replace unsafe-inline With Nonces

    Inline JavaScript creates one of the biggest CSP challenges.

    Adding ‘unsafe-inline’ may make errors disappear, but it also weakens script protection.

    I prefer nonces.

    A server generates a random value for each response and includes it in the policy:

    Content-Security-Policy: script-src ‘self’ ‘nonce-R4nd0mSt21ng’;

    The same nonce appears on an approved inline script:

    <script nonce=”R4nd0mSt21ng”>

      console.log(“Approved script”);

    </script>

    Only scripts carrying the matching nonce can execute.

    In real deployments, the nonce must be cryptographically unpredictable and generated separately for each response. It should never be hard-coded like the demonstration value above.

    Step 6: Deploy CSP Through HTTP Headers

    Although CSP can be configured with an HTML <meta> element, I normally use HTTP response headers.

    Headers provide broader directive support and keep security configuration at the server or application layer.

    For Nginx:

    add_header Content-Security-Policy “default-src ‘self’; script-src ‘self’;”;

    For Apache:

    Header set Content-Security-Policy “default-src ‘self’; script-src ‘self’;”

    Frameworks can also generate CSP headers. Next.js, for example, supports response header configuration through its application configuration.

    Regardless of platform, learning how to create a content security policy also means confirming that the header appears on every relevant response.

    Step 7: Monitor Violations After Enforcement

    CSP is not a configure-once feature.

    New analytics tools, payment providers, widgets, marketing tags, or application features can introduce new resource origins.

    I review CSP violations whenever major frontend changes are released.

    That turns the policy into a living inventory of what the application trusts.

    A Practical CSP Example

    Here is a simple scenario I use to explain how to create a content security policy without overcomplicating it.

    Imagine a site needs its own JavaScript and CSS, images from its own domain, API calls to its own backend, and no embedded frames.

    A sensible starting policy could be:

    Content-Security-Policy: default-src ‘self’; script-src ‘self’; style-src ‘self’; img-src ‘self’; connect-src ‘self’; frame-ancestors ‘none’; form-action ‘self’; object-src ‘none’;

    Now imagine marketing adds an analytics provider.

    I would not broaden default-src. I would add the required analytics origin only to the appropriate directive.

    That is the central security habit: widen the smallest possible part of the policy.

    Common Content Security Policy Mistakes

    The most common mistake I see when people research how to create a content security policy is copying someone else’s header.

    Their dependencies are not your dependencies.

    Another problem is relying heavily on *, https:, ‘unsafe-inline’, or ‘unsafe-eval’. These values may make deployment easier, but they can remove protections the CSP was supposed to provide.

    I also avoid enforcing a complex policy before Report-Only testing.

    Finally, CSP should not create false confidence. It does not repair vulnerable application code. You still need output encoding, secure authentication, protected cookies, safe dependency management, and server-side validation.

    Frequently Asked Questions

    1. What is the easiest way to learn how to create a content security policy?

    Start with a resource inventory, create restrictive directives, deploy them in Report-Only mode, investigate violations, then enforce the verified policy.

    2. Should I use default-src ‘self’ in CSP?

    It is a useful starting fallback, but dedicated directives such as script-src, connect-src, frame-ancestors, and form-action give you finer control.

    3. Should I use unsafe-inline in a Content Security Policy?

    Avoid it for scripts when possible. Nonces or hashes allow approved inline code without granting permission to every inline script.

    4. Can a Content Security Policy completely prevent XSS?

    No. CSP provides powerful defense in depth, but secure coding, output encoding, validation, dependency security, and other XSS protections are still required.

    Lock It Down Without Breaking Everything

    When I approach how to create a content security policy, I focus less on producing the longest header and more on minimizing trust.

    Inventory your dependencies. Start restrictive. Test with Report-Only. Investigate every violation. Replace unsafe inline scripts with nonces where practical. Then enforce the policy and continue monitoring it.

    The best CSP is not the one that looks impressive in a security scanner. It is the one that permits exactly what your application needs and very little else.

    Your next step is simple: open your site’s Network panel, list every external resource it loads, and use that inventory to draft your first Report-Only policy.

  • MongoDB Connection Timed Out From Node.js? Try These Fixes

    MongoDB Connection Timed Out From Node.js? Try These Fixes

    Nothing slows down a Node.js project quite like waiting 30 seconds for a database connection only to see MongoServerSelectionError appear in the terminal. I’ve learned that increasing the timeout rarely solves the underlying problem. 

    The real culprit is usually network access, an incorrect MongoDB URI, DNS resolution, credentials, IPv6, or application connection logic.

    If your MongoDB connection timed out from Node.js, I recommend diagnosing the connection from the outside in. Start with MongoDB availability and network access before changing driver settings. Here’s the process I use.

    Why Is My MongoDB Connection Timing Out in Node.js?

    A timeout generally means the MongoDB Node.js driver could not reach or select an appropriate database server within the configured period.

    Common messages include:

    MongoServerSelectionError: Server selection timed out

    MongoTimeoutError

    connect ETIMEDOUT

    ECONNREFUSED 127.0.0.1:27017

    MongooseError: Operation buffering timed out after 10000ms

    These errors do not always have the same cause. MongoServerSelectionError commonly indicates that the driver cannot locate an available server, while a Mongoose buffering timeout can happen when your application tries to use a model before its database connection is ready.

    How Do I Fix a MongoDB Atlas Connection Timeout?

    For MongoDB Atlas, network access is one of the first things I check.

    Check Your MongoDB Atlas IP Access List

    Open Atlas and check the project’s Network Access settings. The public IP address used by your development computer or production server must be allowed to reach the cluster.

    Atlas also permits 0.0.0.0/0, which allows connections from anywhere. Although this can sometimes help during short diagnostic testing, I would not leave it configured as the permanent production solution. Restrict database access to known application addresses whenever possible.

    This check becomes particularly important when deploying to US cloud environments because the server’s outbound IP can differ from your home or office connection.

    Verify Your MongoDB Connection String and Credentials

    Verify Your MongoDB Connection String and Credentials

    A malformed URI can leave the driver trying unsuccessfully to locate or authenticate with MongoDB.

    A local authenticated connection might resemble:

    const uri =

      “mongodb://username:password@127.0.0.1:27017/myDatabase?authSource=admin”;

    If the database user authenticates against admin, authSource=admin may be required.

    Also inspect passwords containing characters such as @, /, : or #. Reserved characters used inside a URI must be percent-encoded where appropriate. Otherwise, the driver may interpret part of your password as URI syntax.

    Why Does MongoDB Fail With Localhost but Work With 127.0.0.1?

    Modern Node.js environments can resolve localhost to the IPv6 loopback address ::1. If MongoDB is listening only through IPv4, your application may return something similar to:

    ECONNREFUSED ::1:27017

    Try:

    mongodb://127.0.0.1:27017/myDatabase

    instead of:

    mongodb://localhost:27017/myDatabase

    Also verify that the local MongoDB service is running and listening on port 27017.

    How Can I Test MongoDB Port 27017 and Firewall Access?

    Before modifying Node.js code, test whether your machine can reach the MongoDB host.

    On macOS or Linux, Netcat can help:

    nc -zv your-mongodb-host 27017

    On Windows PowerShell, try:

    Test-NetConnection -ComputerName your-mongodb-host -Port 27017

    If the request hangs or fails, investigate your firewall, VPN, corporate network, cloud security rules, or outbound network restrictions.

    A network-level failure will not disappear because you increased a JavaScript timeout.

    Can DNS Cause MongoDB Atlas Server Selection Errors?

    Yes. Atlas connection strings beginning with mongodb+srv:// rely on DNS SRV and TXT records.

    If DNS resolution is failing, test the hostname separately and investigate your network’s DNS configuration. Trying a reputable public resolver such as Google Public DNS or Cloudflare DNS can help determine whether the existing resolver is causing the problem.

    You can also compare the SRV connection with an appropriate standard connection string provided for your deployment in Atlas. Treat this as a diagnostic step rather than blindly replacing the URI.

    Which MongoDB Node.js Timeout Settings Should I Change?

    Which MongoDB Node.js Timeout Settings Should I Change

    If the MongoDB connection timed out from Node.js after you have verified networking and configuration, inspect the driver’s timeout options.

    For example:

    const { MongoClient } = require(“mongodb”);

    const client = new MongoClient(uri, {

      serverSelectionTimeoutMS: 30000,

      connectTimeoutMS: 10000,

      socketTimeoutMS: 45000

    });

    These options serve different purposes.

    Setting Purpose
    serverSelectionTimeoutMS Limits how long the driver searches for a suitable server
    connectTimeoutMS Limits time spent establishing a socket connection
    socketTimeoutMS Controls socket inactivity after a connection is established

    Do not assume that increasing serverSelectionTimeoutMS fixes slow queries. Server selection concerns finding a suitable database server, while query execution and socket behavior involve different mechanisms.

    How Do I Fix Mongoose Buffering Timed Out After 10000ms?

    Mongoose can buffer database operations while it waits for a connection. If that connection never becomes usable, you may eventually receive a buffering timeout. Similar connection and locking issues can also occur when working with SQLite, so understanding how to resolve the SQLite Database Is Locked Error in Python can help you troubleshoot database access problems more effectively across different environments.

    I prefer establishing MongoDB connectivity before allowing Express to receive requests:

    async function startServer() {

      try {

        await mongoose.connect(process.env.MONGODB_URI);

        app.listen(3000, () => {

          console.log(“Server started”);

        });

      } catch (error) {

        console.error(“MongoDB connection failed:”, error);

      }

    }

    startServer();

    Also check whether your application mixes mongoose.connect() with mongoose.createConnection(). A model associated with one connection should not accidentally depend on another connection that was never successfully opened.

    Why Does MongoDB Work Locally but Time Out After Deployment?

    When an application works on a developer laptop but fails in production, I compare the two environments rather than immediately rewriting the database code.

    Check production environment variables, Atlas network access, DNS, TLS configuration, firewall policies, and outbound connectivity. AWS, Azure, Google Cloud, serverless platforms, and other hosting environments can have networking behavior that differs substantially from a local machine.

    Can Docker Cause MongoDB Connection Timeouts?

    Inside a Docker container, localhost normally points back to that same container. If MongoDB runs in another container, your Node.js service may need to use the MongoDB service hostname instead.

    For example:

    mongodb://mongodb:27017/myDatabase

    could be correct when your Docker service is named mongodb.

    Also inspect Docker networks and replica-set hostnames. A MongoDB replica set may advertise addresses that your Node.js container cannot resolve.

    Why Does MongoDB Time Out Only Under Heavy Traffic?

    Why Does MongoDB Time Out Only Under Heavy Traffic

    If the problem appears only during traffic spikes, investigate connection pooling rather than immediately extending timeouts.

    Reuse a MongoClient instead of creating a fresh client for every HTTP request. Review maxPoolSize, connection leaks, slow database operations, server resource usage, and network latency.

    Intermittent production failures often require a different diagnosis from a database that never connects at all.

    Frequently Asked Questions (FAQs)

    1. Why does MongoDB server selection time out after 30000ms?

    The driver could not find a suitable MongoDB server within the configured selection period. Check network access, your URI, Atlas settings, DNS, server availability, and firewall rules.

    2. Why is MongoDB Atlas not connecting to Node.js?

    Common causes include an unapproved IP address, incorrect credentials, malformed connection strings, DNS problems, and network restrictions.

    3. Should I increase server Selection Timeout MS?

    Only when your application has a legitimate reason to wait longer. Increasing the setting does not repair a blocked port, invalid hostname, bad credentials, or unavailable MongoDB deployment.

    4. How do I fix MongoDB connection timed out from Node.js?

    Verify MongoDB is running, check your URI and credentials, confirm Atlas network access, test port 27017, investigate DNS and IPv4/IPv6 behavior, and then review driver timeout settings.

    Fix the Cause, Not Just the Timeout

    When I encounter MongoDB connection failures, I work through the connection path systematically: database availability, IP access, URI, authentication, network connectivity, DNS, application logic, and finally timeout configuration.

    That order prevents a common mistake—making an application wait longer for a database it cannot reach. Once you identify whether the failure comes from Atlas, Mongoose, Docker, DNS, a firewall, or connection pooling, the timeout becomes much easier to solve.

  • How to Create Custom Middleware in Laravel: A Modern Guide

    How to Create Custom Middleware in Laravel: A Modern Guide

    A Laravel route without the right protection can feel like an office with every door unlocked. Anyone may reach pages, actions, or resources that should remain restricted. That is why I use middleware as a smart checkpoint between an incoming request and the application logic behind it.

    In this guide, I’ll show you how to create custom middleware in Laravel to protect admin routes, verify user roles, control subscriptions, and filter requests without cluttering controllers. I’ll also explain the modern setup for Laravel 11, 12, and 13, along with the key difference for older Laravel versions.

    What Does Custom Middleware Do in Laravel?

    Middleware acts as a filter in Laravel’s HTTP request lifecycle. When a request enters the application, middleware can inspect it before allowing it to continue to a route or controller.

    Laravel includes built-in middleware for common requirements such as authentication and CSRF protection. Custom middleware extends that idea to application-specific requirements.

    For example, a US-based SaaS platform might use middleware to restrict account-management pages to administrators, verify an active subscription before displaying premium features, check user roles, log requests, or enforce additional API requirements.

    The major advantage is separation of concerns. Instead of repeating permission checks inside several controllers, I can define the rule once and reuse it. This same approach is useful when troubleshooting How to Fix CORS Error in React and Node.js, where keeping frontend and backend configuration rules organized makes it easier to identify and resolve cross-origin issues.

    How Do I Generate Custom Middleware in Laravel? 

    Laravel’s Artisan command-line tool creates the basic middleware class for me. From the project’s root directory, I run:

    php artisan make:middleware EnsureUserIsAdmin

    Laravel generates:

    app/Http/Middleware/EnsureUserIsAdmin.php

    Using a descriptive name such as EnsureUserIsAdmin also makes the purpose immediately understandable when another developer reviews the project.

    How Do I Add Custom Logic to the handle() Method?

    How Do I Add Custom Logic to the handle() Method

    Next, I open the generated class and add my filtering logic to its handle() method:

    <?php

    namespace App\Http\Middleware;

    use Closure;

    use Illuminate\Http\Request;

    use Symfony\Component\HttpFoundation\Response;

    class EnsureUserIsAdmin

    {

        public function handle(Request $request, Closure $next): Response

        {

            if (!$request->user() || !$request->user()->is_admin) {

                return redirect()

                    ->route(‘home’)

                    ->with(‘error’, ‘Unauthorized access.’);

            }

            return $next($request);

        }

    }

    The $request->user() check confirms that an authenticated user exists, while is_admin represents an application-specific field used to determine administrative access.

    When the condition passes, $next($request) sends the request deeper into Laravel’s application pipeline.

    Should I Redirect the User or Return 403?

    The right response depends on the application.

    For a traditional website, I may redirect the visitor to a safe page and display an error. If an authenticated user is attempting to access something they do not have permission to use, I often prefer:

    abort(403, ‘Unauthorized access.’);

    For an API, a JSON response is usually more appropriate:

    return response()->json([

        ‘message’ => ‘You do not have permission to access this resource.’

    ], 403);

    Choosing the appropriate response makes the behavior clearer for users, front-end applications, and API consumers.

    How Do I Register Middleware in Laravel 11, 12, and 13?

    This is where many older tutorials can cause confusion. Modern Laravel applications configure middleware through bootstrap/app.php rather than the legacy HTTP kernel.

    After learning how to create custom middleware in Laravel, I register an alias so I can easily reuse the middleware across routes.

    A modern bootstrap/app.php configuration can look like this:

    <?php

    use App\Http\Middleware\EnsureUserIsAdmin;

    use Illuminate\Foundation\Application;

    use Illuminate\Foundation\Configuration\Middleware;

    return Application::configure(basePath: dirname(__DIR__))

        ->withRouting(

            web: __DIR__.’/../routes/web.php’,

            commands: __DIR__.’/../routes/console.php’,

            health: ‘/up’,

        )

        ->withMiddleware(function (Middleware $middleware) {

            $middleware->alias([

                ‘admin’ => EnsureUserIsAdmin::class,

            ]);

        })

        ->create();

    The admin alias now gives me a short, readable way to assign EnsureUserIsAdmin to routes.

    What About Laravel 10 and Earlier?

    What About Laravel 10 and Earlier

    Laravel 10 and earlier applications commonly register route middleware in:

    app/Http/Kernel.php

    Always verify your Laravel version before changing middleware configuration. Copying an old Kernel.php tutorial into a modern Laravel project is a common source of unnecessary errors.

    How Do I Protect Laravel Routes With Custom Middleware?

    Once the alias exists, I can protect a single route in routes/web.php:

    use App\Http\Controllers\AdminController;

    Route::get(‘/admin/dashboard’, [AdminController::class, ‘index’])

        ->middleware(‘admin’);

    For several admin routes, a middleware group keeps the routing file cleaner:

    Route::middleware([‘auth’, ‘admin’])->group(function () {

        Route::get(‘/admin/settings’, [AdminController::class, ‘settings’]);

        Route::get(‘/admin/users’, [AdminController::class, ‘users’]);

    });

    Adding auth before admin allows Laravel’s authentication middleware to handle guests before my custom authorization check runs.

    Can I Use the Middleware Class Without an Alias?

    Yes. I can assign the class directly:

    use App\Http\Middleware\EnsureUserIsAdmin;

    Route::get(‘/admin/dashboard’, [AdminController::class, ‘index’])

        ->middleware(EnsureUserIsAdmin::class);

    I usually prefer aliases when middleware appears repeatedly because they make route definitions shorter.

    How Do Global and Web Middleware Registration Work?

    Laravel also allows middleware to run globally. Inside the middleware configuration, I can append a class with:

    $middleware->append(EnsureUserIsAdmin::class);

    That makes it run on every HTTP request, so I would not normally make an admin-only authorization check global.

    Middleware can also be added to Laravel’s web middleware group:

    $middleware->web(append: [

        EnsureUserIsAdmin::class,

    ]);

    I use these approaches only when a middleware rule genuinely applies to every request or every route within that middleware stack. Route-level aliases are safer for narrowly targeted authorization rules.

    How Do I Pass Parameters to Laravel Middleware?

    Parameterized middleware lets one class support several roles.

    For example:

    public function handle(

        Request $request,

        Closure $next,

        string $role

    ): Response {

        if (!$request->user() || $request->user()->role !== $role) {

            abort(403);

        }

        return $next($request);

    }

    I can then apply a role through an alias:

    Route::get(‘/editor’, [EditorController::class, ‘index’])

        ->middleware(‘role:editor’);

    This approach can be cleaner than creating separate middleware classes for administrators, editors, managers, and other roles.

    How Do I Test Custom Middleware?

    How Do I Test Custom Middleware

    I test both authorized and unauthorized scenarios. Laravel feature tests make that straightforward:

    $response = $this->actingAs($regularUser)

        ->get(‘/admin/dashboard’);

    $response->assertForbidden();

    I would also test an administrator and verify that the protected route succeeds. Testing both paths prevents future application changes from silently breaking access controls.

    Why Is My Laravel Middleware Not Working?

    If Laravel does not recognize my middleware alias, I first confirm that the alias in bootstrap/app.php exactly matches the route definition.

    I can also clear cached application data:

    php artisan optimize:clear

    If $request->user() returns null, I verify that authentication runs before the custom middleware by using [‘auth’, ‘admin’].

    For a Target class does not exist error, I check the namespace, filename, class name, imports, and alias. After changing namespaces or classes, regenerating Composer’s autoloader may help:

    composer dump-autoload

    These checks solve many of the common middleware configuration problems I encounter.

    What Are the Best Practices for Laravel Custom Middleware?

    I keep middleware focused on request filtering and avoid placing large business workflows inside the handle() method. Complex authorization may belong in Laravel policies, while broader business operations generally belong in dedicated application or service layers.

    Clear names such as EnsureUserIsAdmin, CheckSubscription, and VerifyAccountStatus also make larger applications easier to understand.

    Most importantly, I check the Laravel version before following registration instructions. The move from app/Http/Kernel.php to configuration in bootstrap/app.php makes version-aware guidance essential.

    Frequently Asked Questions (FAQs)

    1. Where is custom middleware stored in Laravel?

    Laravel normally creates custom middleware classes inside the app/Http/Middleware directory.

    2. Can Laravel routes use multiple middleware?

    Yes. A route or route group can use multiple middleware, such as auth followed by custom role or permission middleware.

    3. Do I have to create an alias for custom middleware?

    No. Laravel allows you to assign the middleware class directly to a route. Aliases are mainly useful for shorter, reusable route definitions.

    4. How to create custom middleware in Laravel for role-based access?

    Generate a middleware class with Artisan, check the authenticated user’s role inside handle(), optionally create an alias in bootstrap/app.php, and attach it to the routes or route groups that require that role.

    Make Middleware Work for You, Not Against You

    I find custom middleware most valuable when I treat it as a focused request filter rather than a place to store every authorization or business rule. A well-designed middleware class can protect routes, verify roles, enforce subscriptions, and keep repetitive request checks out of controllers.

    For current Laravel projects, the greatest detail to remember is where registration happens. Laravel 11, 12, and 13 use bootstrap/app.php, while older projects may still rely on app/Http/Kernel.php. Once I combine the correct registration method with clear aliases, targeted route groups, parameters, and feature tests, middleware becomes a simple and maintainable part of the application architecture.