

How to Host Multiple Domains With Nginx Ubuntu Web Server
In this article, we gonna learn, how to host multiple domains on the nginx web server. Also how to setup SSL for these domains
Ubuntu Version:- 20.04
Let's take an example of two domains example1.com and example2.com
1. Create A record on DNS records that points to your server.

2. Log into your server via SSH.
ssh root@your_server_ip3. Update apt and install nginx.
sudo apt updatesudo apt install nginx4. Enable firewall.
Check firewall status.
sudo ufw statusroot@ultimateakash:~# sudo ufw status
Status: inactiveIf firewall's status is inactive, activate it by hitting the below command.
sudo ufw enableroot@ultimateakash:~# sudo ufw enable
Command may disrupt existing ssh connections. Proceed with operation (y|n)? y
Firewall is active and enabled on system startup5. Update ufw application profiles.
List the ufw application profiles.
sudo ufw app listroot@ultimateakash:~# sudo ufw app list
Available applications:
Nginx Full
Nginx HTTP
Nginx HTTPS
OpenSSHThese nginx profiles were added during nginx installation.
Allow Nginx Full and OpenSSH profiles.
sudo ufw allow 'Nginx Full'sudo ufw allow OpenSSHCheck ufw status.
sudo ufw statusroot@ultimateakash:~# sudo ufw status
Status: active
To Action From
-- ------ ----
Nginx Full ALLOW Anywhere
OpenSSH ALLOW Anywhere
Nginx Full (v6) ALLOW Anywhere (v6)
OpenSSH (v6) ALLOW Anywhere (v6)6. Check nginx status
sudo systemctl status nginxroot@ultimateakash:~# sudo systemctl status nginx
● nginx.service - A high performance web server and a reverse proxy server
Loaded: loaded (/lib/systemd/system/nginx.service; enabled; vendor preset: enabled)
Active: active (running) since Sat 2022-07-09 08:03:56 UTC; 1min 16s ago
Docs: man:nginx(8)
Main PID: 9282 (nginx)
Tasks: 2 (limit: 2339)
Memory: 3.8M
CGroup: /system.slice/nginx.service
├─9282 nginx: master process /usr/sbin/nginx -g daemon on; master_process on;
└─9283 nginx: worker processOpen your domain/server IP in the browser. You will see the default nginx installation page(/var/www/html/index.nginx-debian.html ).
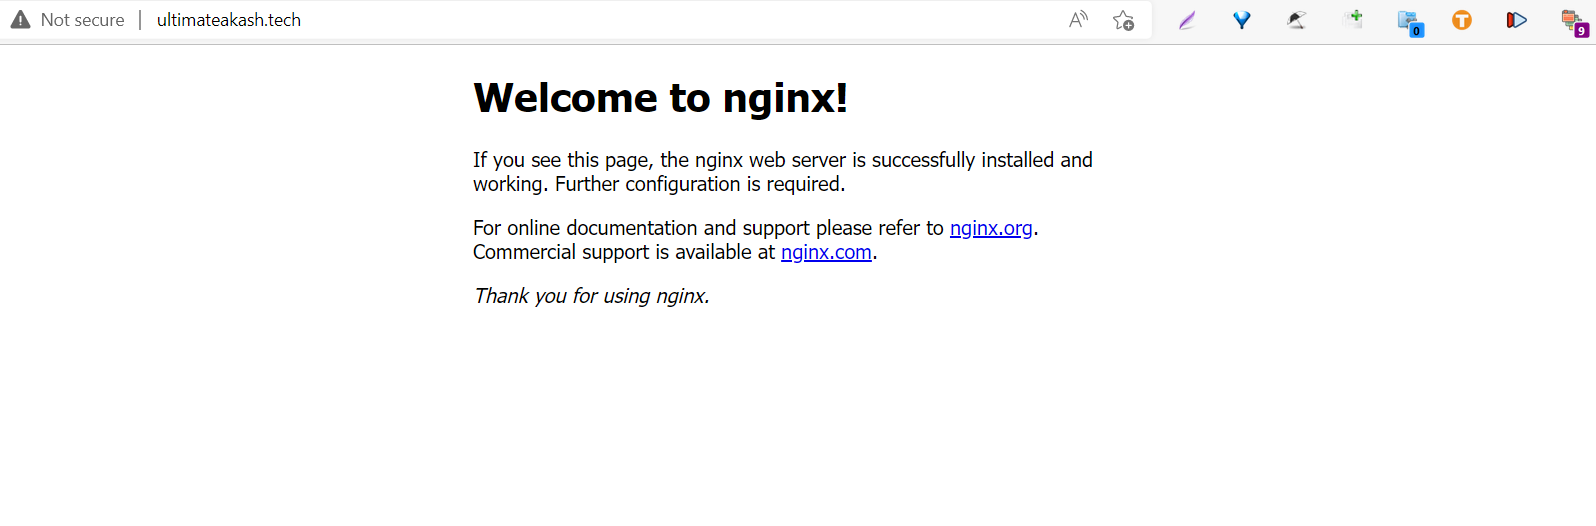
Nginx has one server block enabled by default that is configured to serve documents from the /var/www/html directory.
7. Setup Server Blocks.
Create the directory for your domains.
sudo mkdir /var/www/example1.comsudo mkdir /var/www/example2.comAssign ownership of the directory with the $USER environment variable.
sudo chown -R $USER:$USER /var/www/example1.comsudo chown -R $USER:$USER /var/www/example2.comGrant 775 permission to www directory.
sudo chmod -R 755 /var/wwwCreate a sample index.html for example1.com
sudo nano /var/www/example1.com/index.html<html>
<head>
<title>example1.com</title>
</head>
<body>
<h1>Welcome to example1.com</h1>
</body>
</html>press ctrl + x and press y then hit enter.
Create a sample index.html for example2.com
sudo nano /var/www/example2.com/index.html<html>
<head>
<title>example2.com</title>
</head>
<body>
<h1>Welcome to example2.com</h1>
</body>
</html>press ctrl + x and press y then hit enter.
Create a config file for example1.com.
sudo nano /etc/nginx/sites-available/example1.comserver {
listen 80;
listen [::]:80;
root /var/www/example1.com;
index index.html index.htm index.nginx-debian.html;
server_name example1.com www.example1.com;
location / {
try_files $uri $uri/ =404;
}
}press ctrl + x and press y then hit enter.
Create a config file for example2.com.
sudo nano /etc/nginx/sites-available/example2.comserver {
listen 80;
listen [::]:80;
root /var/www/example2.com;
index index.html index.htm index.nginx-debian.html;
server_name example2.com www.example2.com;
location / {
try_files $uri $uri/ =404;
}
}These two lines
root /var/www/your_domain;
server_name your_domain www.your_domain;
press ctrl + x and press y then hit enter.
Enable this new configuration by creating a link from it to the sites-enabled directory.
sudo ln -s /etc/nginx/sites-available/example1.com /etc/nginx/sites-enabled/sudo ln -s /etc/nginx/sites-available/example2.com /etc/nginx/sites-enabled/Uncomment bucket size.
sudo nano /etc/nginx/nginx.confFind server_names_hash_bucket_size directive and remove the # symbol to uncomment the line.
http {

        ##
        # Basic Settings
        ##

        sendfile on;
        tcp_nopush on;
        tcp_nodelay on;
        keepalive_timeout 65;
        types_hash_max_size 2048;
        # server_tokens off;

        server_names_hash_bucket_size 64;
Test configuration.
sudo nginx -troot@ultimateakash:~# sudo nginx -t
nginx: the configuration file /etc/nginx/nginx.conf syntax is ok
nginx: configuration file /etc/nginx/nginx.conf test is successfulReload nginx to implement the changes.
sudo systemctl reload nginx8. Next, open your domains in the browser. you will see our sample index.html
9. Install SSL certificates.
Install Certbot
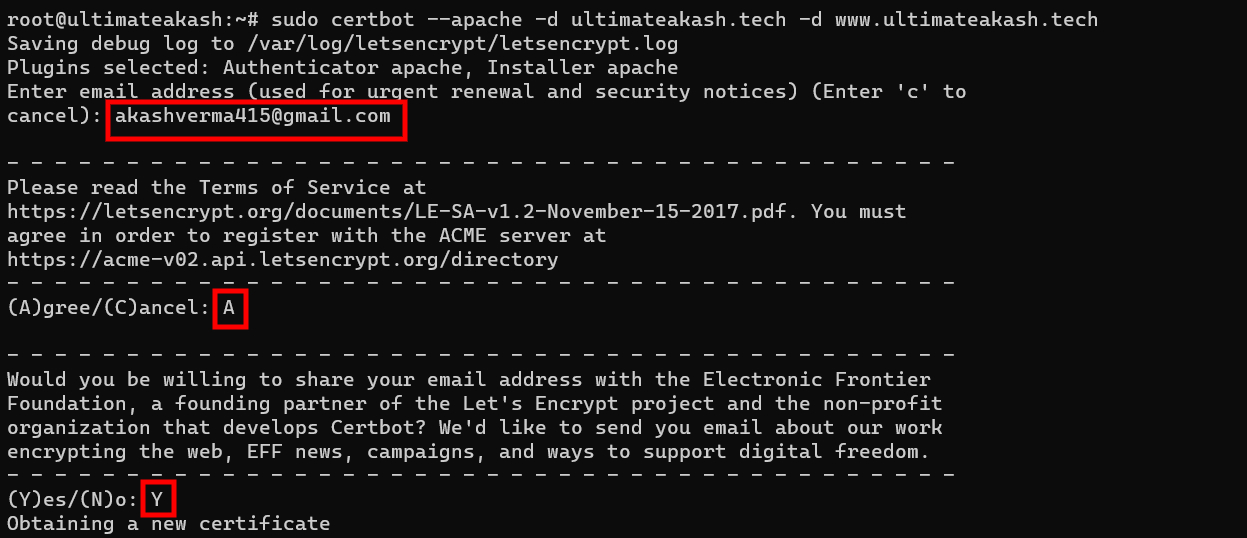
sudo apt install certbot python3-certbot-nginxObtaining SSL certificates.
sudo certbot --nginx -d example1.com -d www.example1.com -d example2.com -d www.example2.comyou can pass multiple domains with -d option. you can even use wildcards.
-d *.example1.comAfter hitting the above command you need to pass your email also you need to provide a few answers.
Checkout the sample below.
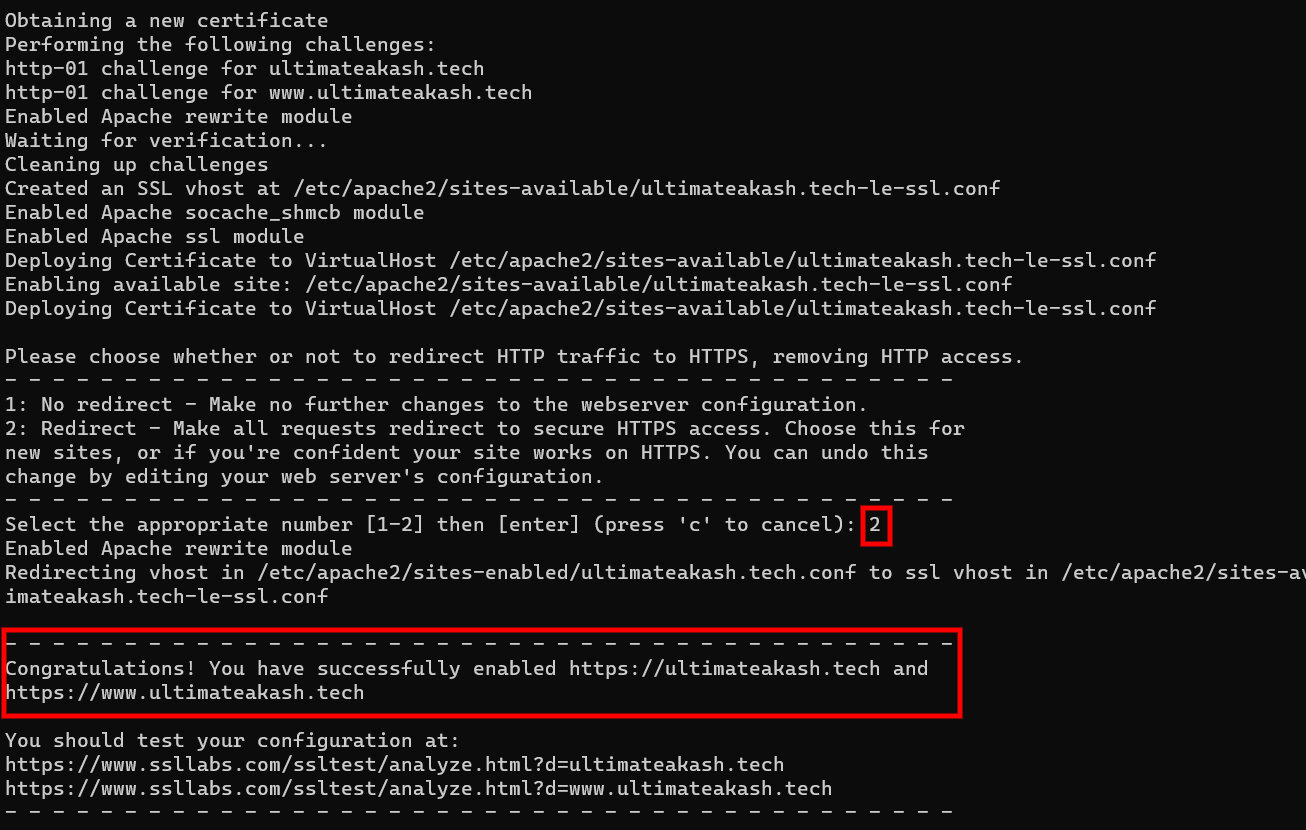
After completing the above step SSL certificates will be installed on your domains. You can verify it by hitting the https protocol.
Let’s Encrypt’s certificates are only valid for 90 days. but don't worry certbot takes care of renewals.
Check certbot's renewal service status.
sudo systemctl status certbot.timerroot@ultimateakash:~# sudo systemctl status certbot.timer
● certbot.timer - Run certbot twice daily
Loaded: loaded (/lib/systemd/system/certbot.timer; enabled; vendor preset: enabled)
Active: active (waiting) since Sun 2022-07-03 15:37:21 UTC; 5s ago
Trigger: Mon 2022-07-04 06:42:10 UTC; 15h left
Triggers: ● certbot.service
Jul 03 15:37:21 ultimateakash systemd[1]: Started Run certbot twice daily.


Leave Your Comment